How to connect the hub
Prepare the hub for setup
Before starting the setup in the app, prepare the hub for connection.
Inside the hub box, you will find:
• GARM Link PRO hub — the main device
• Power adapter (input: 110–240 V, output: 12 V / 2 A) — for connecting the hub to a power outlet
• Rechargeable battery (Li-Ion, 3.7 V, 1800 mAh) — provides backup power during power outages
• Radio module antenna — for communication with wireless sensors
• Wi-Fi / GSM antenna — for internet connection via Wi-Fi or mobile network
• Double-sided tape — for securing the battery inside the enclosure
• Screws (4 pcs.) and wall plugs (4 pcs.) — for mounting the hub on a wall if needed
• Device passport / quick start guide
1. Install the battery
The rechargeable battery keeps the hub running during a power outage. If the main power is lost, the hub will automatically switch to battery power and continue protecting your site.
1. Turn the hub over
2. Carefully unscrew the screws and remove the cover to access the board
3. Connect the battery connector to the corresponding socket on the board
4. Secure the battery inside the enclosure using the included double-sided tape to prevent movement

5. Reinstall the cover and tighten the screws
We recommend installing the battery before powering on the hub for the first time. While connected to power, the battery will charge automatically and remain ready for backup use.
|
2. Connect the antennas
The hub comes with two antennas, each responsible for a different communication channel. Without them, the hub will not be able to connect to the internet or communicate with sensors, so connect both antennas before powering on the device.
• Short antenna with a gold-colored base — radio module antenna for communication with wireless sensors such as motion, door, or leak detectors
• Long white antenna with a rotating base — Wi-Fi / GSM antenna for internet connection

1. Locate the antenna connectors on the hub enclosure
2. Screw the short antenna with the gold-colored base into the left connector
3. Screw the long white antenna into the right connector
4. Tighten each antenna clockwise until lightly secured
For the best signal reception, position both antennas vertically. This provides maximum coverage for connected sensors.
|
3. Insert a SIM card (if mobile internet is required)
If there is no Wi-Fi available at the site, or if you want to use mobile internet as the main or backup connection:
1. Open the rear cover of the hub
2. Insert the SIM card into the slot under the cover

3. Close the cover
Make sure your mobile operator provides 2G coverage at the hub installation location. The hub uses the 2G network for data transmission, so the connection will not work without coverage.
|
4. Connect the power
1. Plug the power adapter connector into the socket on the hub
2. Plug the adapter into a power outlet (the adapter supports 110–240 V and works with most power standards)
3. Wait until the hub indicator lights up — this means the device is powered on and ready for setup
Place the hub in a central part of the room to ensure a stable radio signal for all sensors. Use the included screws and wall plugs if you want to mount the hub on a wall.
|
Once the hub is powered on and ready, continue with setup in the app.
How to connect the hub in the app
-
Start adding the hub
On the main screen of the app, tap the Add button
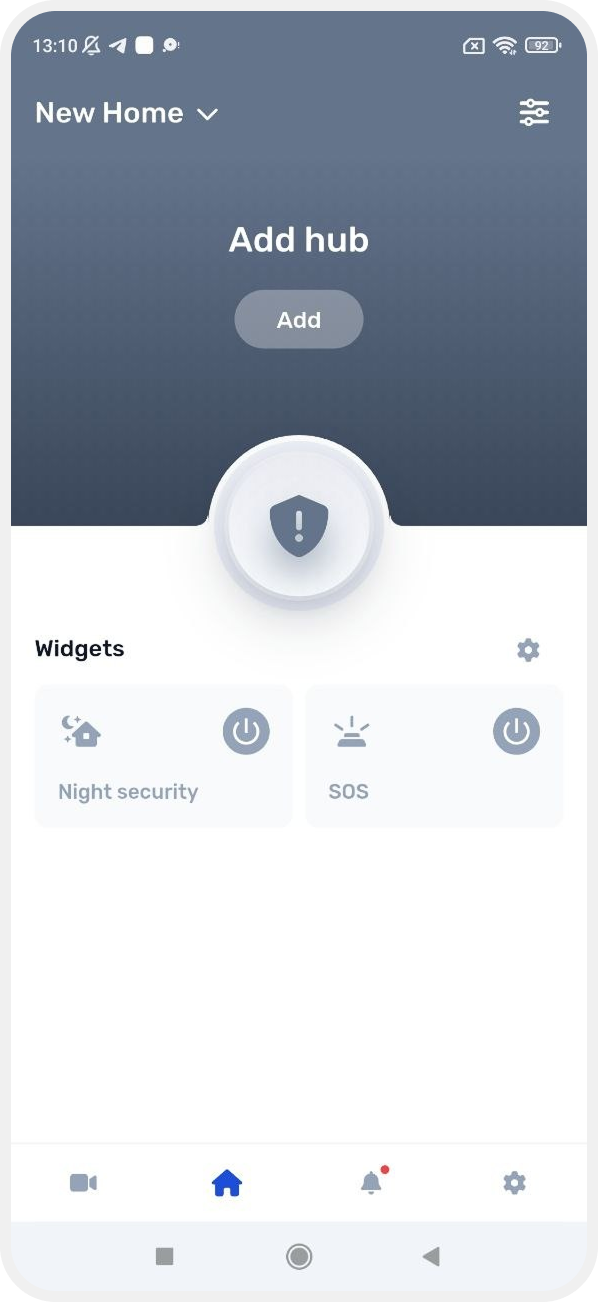
2. Enter the hub code
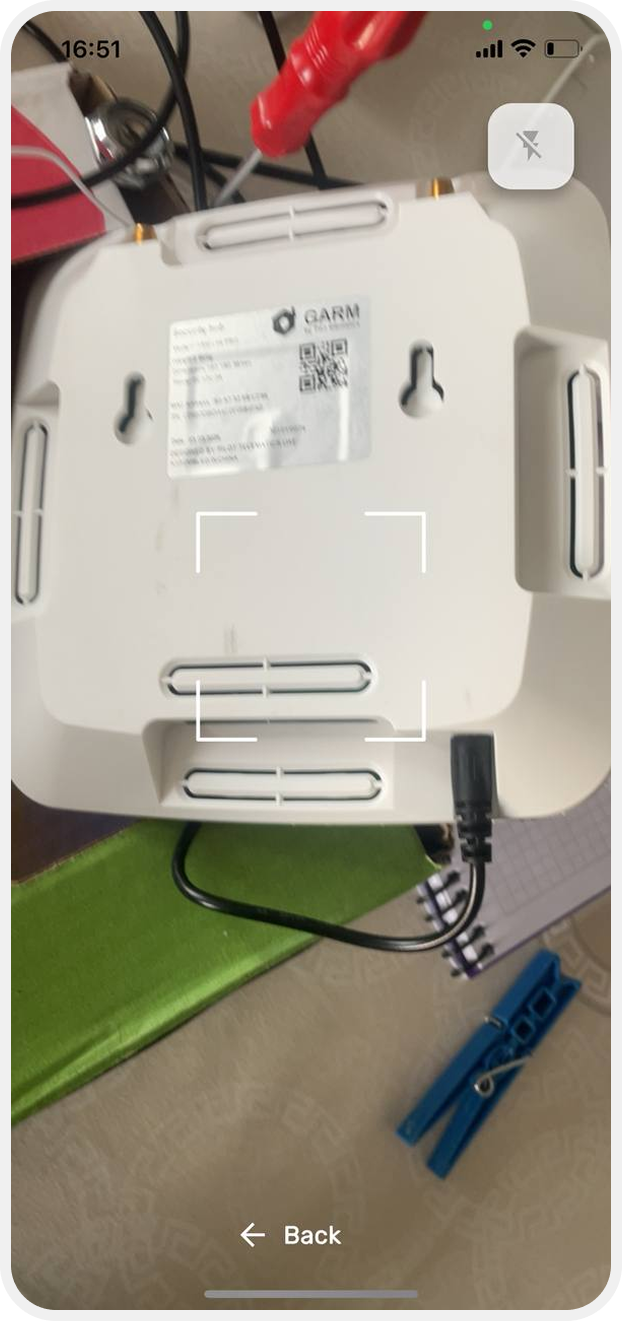
On the next screen, enter the hub serial code. You can do this in two ways:
• Manually — enter the code in the input field
• Using the camera — tap the QR code icon and scan the code on the hub enclosure
The QR code is located on the back of the hub. The app may request camera access — allow access so the scanner can work.
|

After entering the code, two connection options will be available:
To configurate
Use this option if you are connecting the hub for the first time or want to reconfigure the hub’s internet connection (Wi-Fi or GPRS).
Tap To configurate to continue with internet connection configuration.
Hub already set up
Use this option if the hub has already been configured and connected to the internet before.
For example:
— you removed the hub from the app and are adding it again
— the Wi-Fi or GPRS settings are already saved in the hub
— the hub is already connected to the network and online
In this case, there is no need to configure the internet connection again.
Simply scan the QR code and tap “Hub Already Configured” — the app will immediately add the hub and open the main screen.
Wi-Fi and GPRS settings remain stored in the device memory even after removing the hub from the app.
After tapping “Set Up,” the hub internet connection settings screen will open.
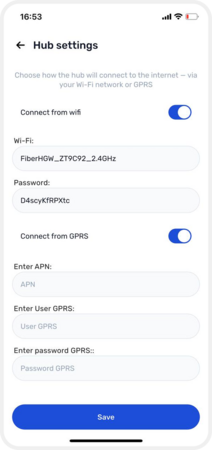
The hub must be connected to the internet to work remotely. On the “Hub Settings” screen, choose how the hub will connect to the internet.
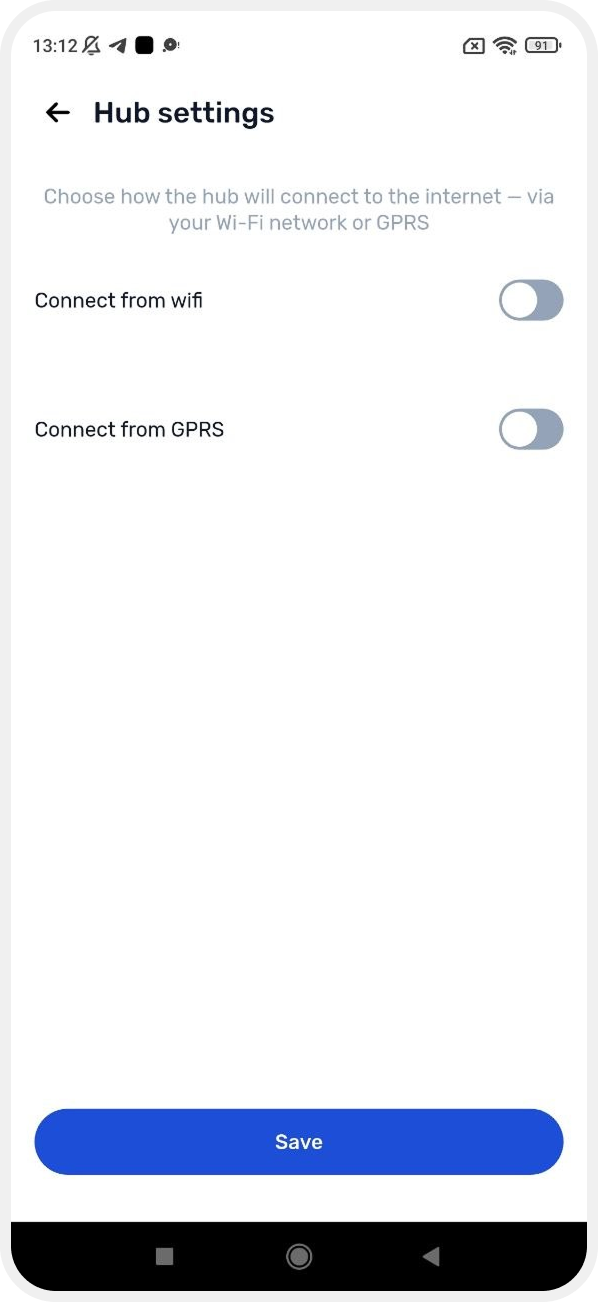
Two connection methods are available:
Wi-Fi connection
This is the easiest option if you have a standard Wi-Fi router.
1. Enable the Wi-Fi connection switch
2. Enter your Wi-Fi network name in the Wi-Fi field
3. Enter the Wi-Fi password in the Password field
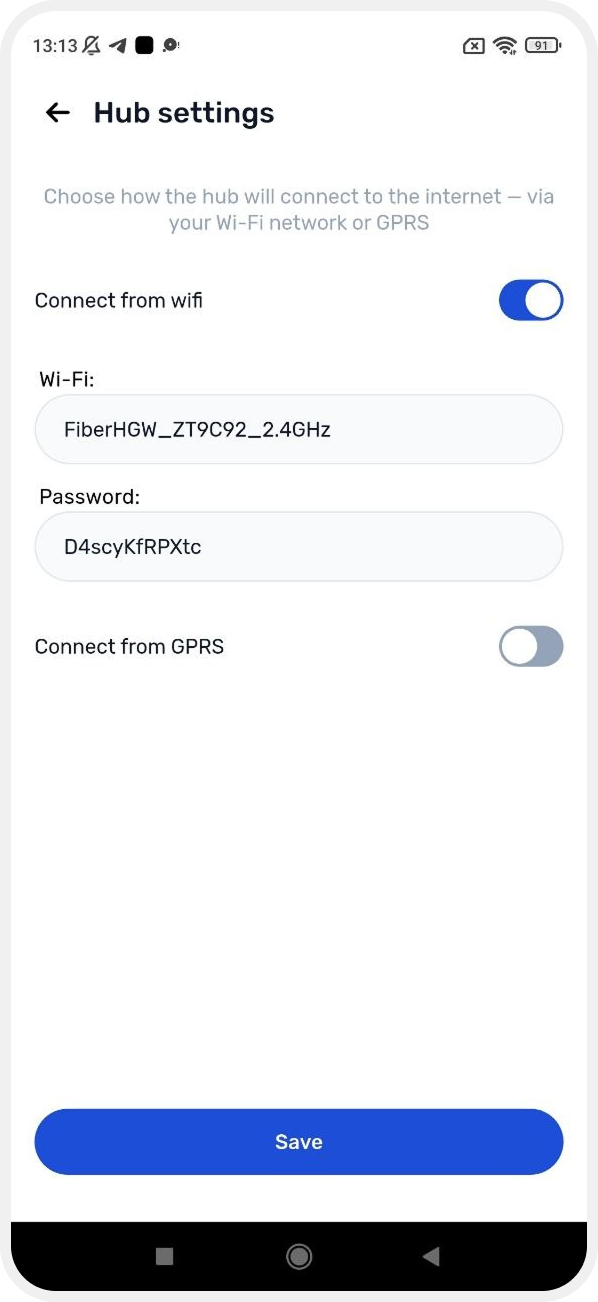
4. Tap Save
GPRS connection (mobile internet)
If Wi-Fi is not available at the site, the hub can connect to the internet using a SIM card.
Make sure your mobile operator provides 2G coverage at the installation location. The hub uses the 2G network for data transmission.
|
1. Insert a SIM card with mobile internet into the hub
2. Enable the GPRS connection switch
3. Fill in the following fields:
• APN — internet access point (check with your mobile operator)
• GPRS Username — if required by the operator
• GPRS Password — if required by the operator
4. Tap Save to apply the network settings
You can enable both Wi-Fi and GPRS at the same time. In this case, the hub will use Wi-Fi as the main connection and GPRS as a backup if Wi-Fi becomes unavailable.
|
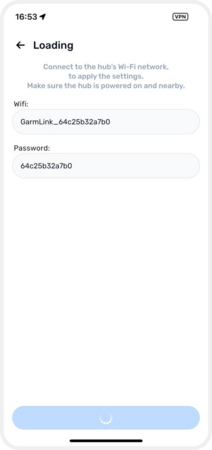
4. Connect to the hub access point
Now the app needs to communicate directly with the hub to transfer the settings. Your phone will temporarily connect to the hub’s Wi-Fi network.
1. On the “Connect to Hub” screen, you will see:
• Hub network name — it looks like GarmLink_xxxxxxxxxxxx
• Password — the same characters shown after GarmLink_ in the network name
2. Tap Continue
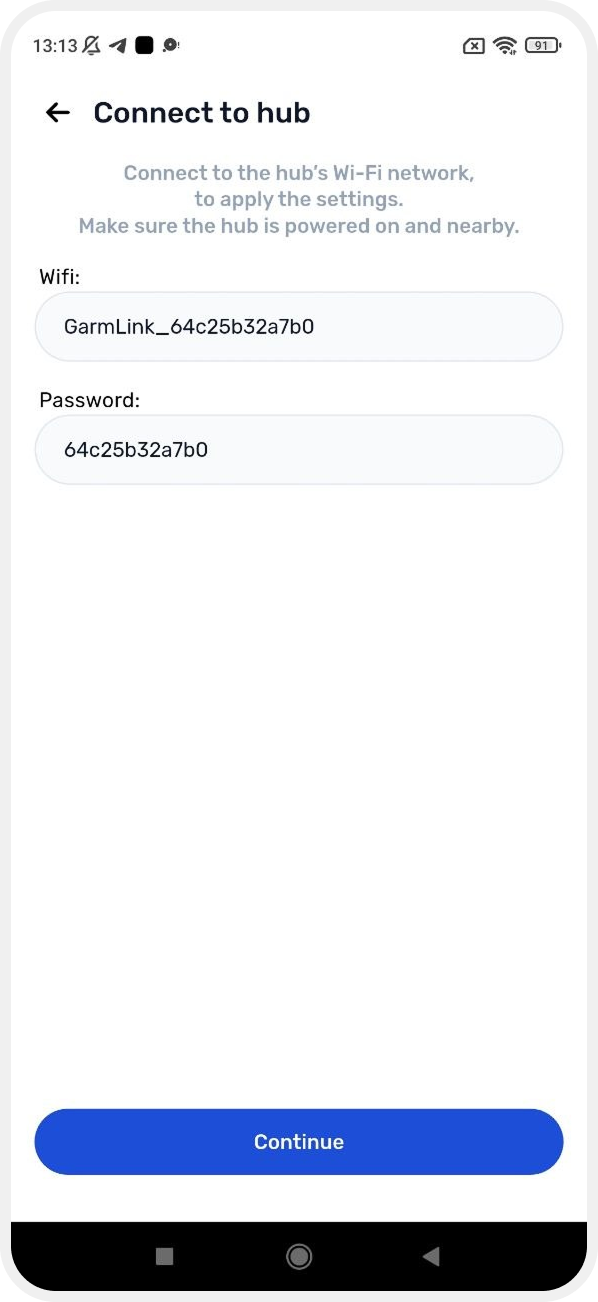
3. The app will prompt you to connect to the hub network — tap Connect
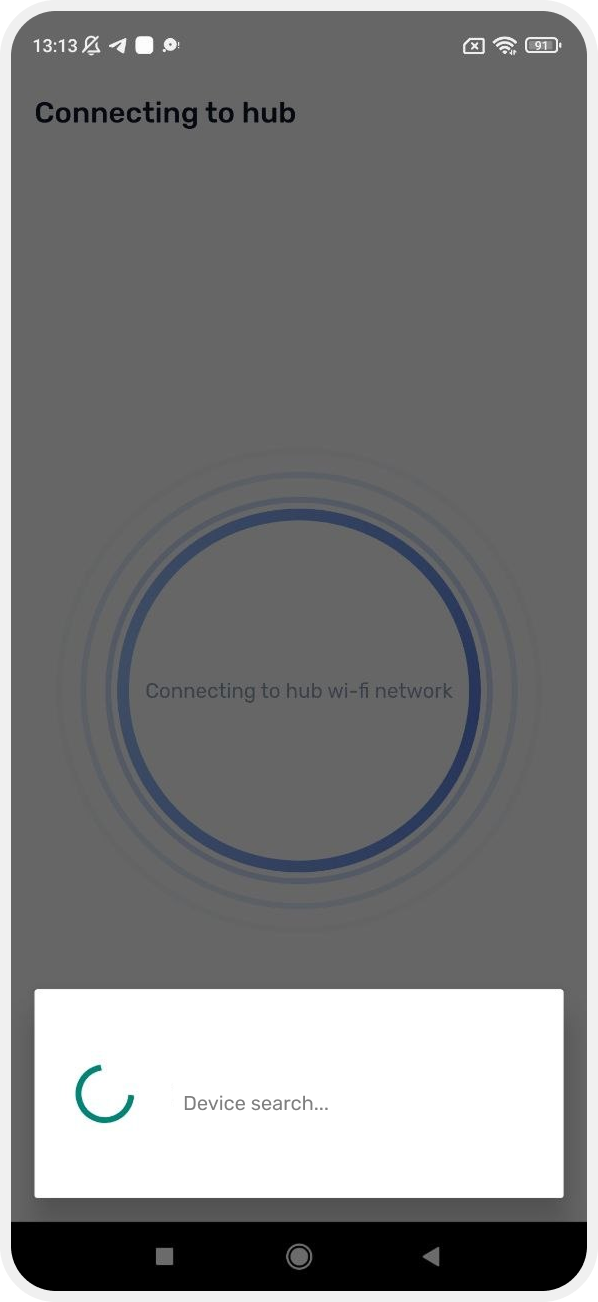
This temporary connection is required to transfer the settings. After setup is complete, reconnect your phone to your regular Wi-Fi network.
|
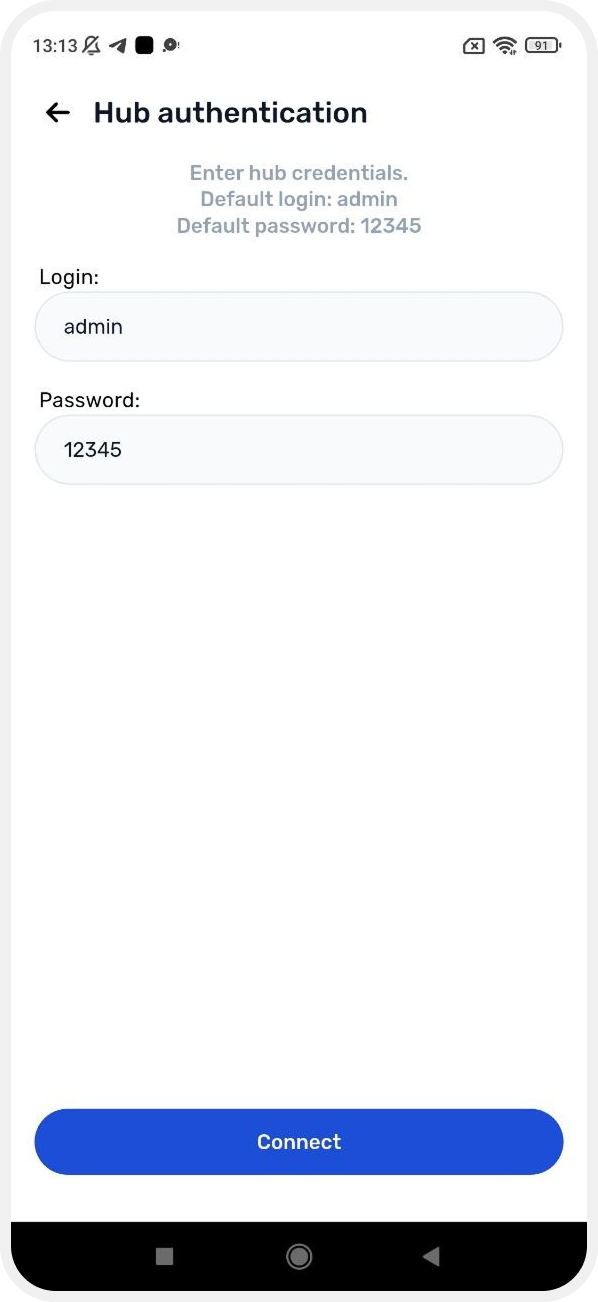
5. Log in to the hub
At this step, enter the username and password for hub access.
Why is this needed? The password protects your hub from unauthorized access. It is required to securely send the configuration to the server and configure the device. The same password is also used to access the device web interface.
|
Enter the login credentials:
• Username: admin
• Password: 12345 (default password)
Tap Connect.
6. Hub added
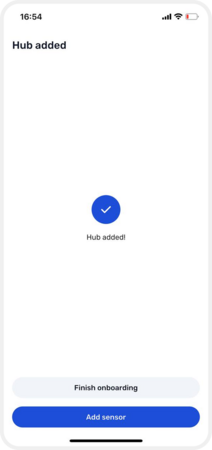
After a successful connection, you will see the confirmation message: “Hub added!”.
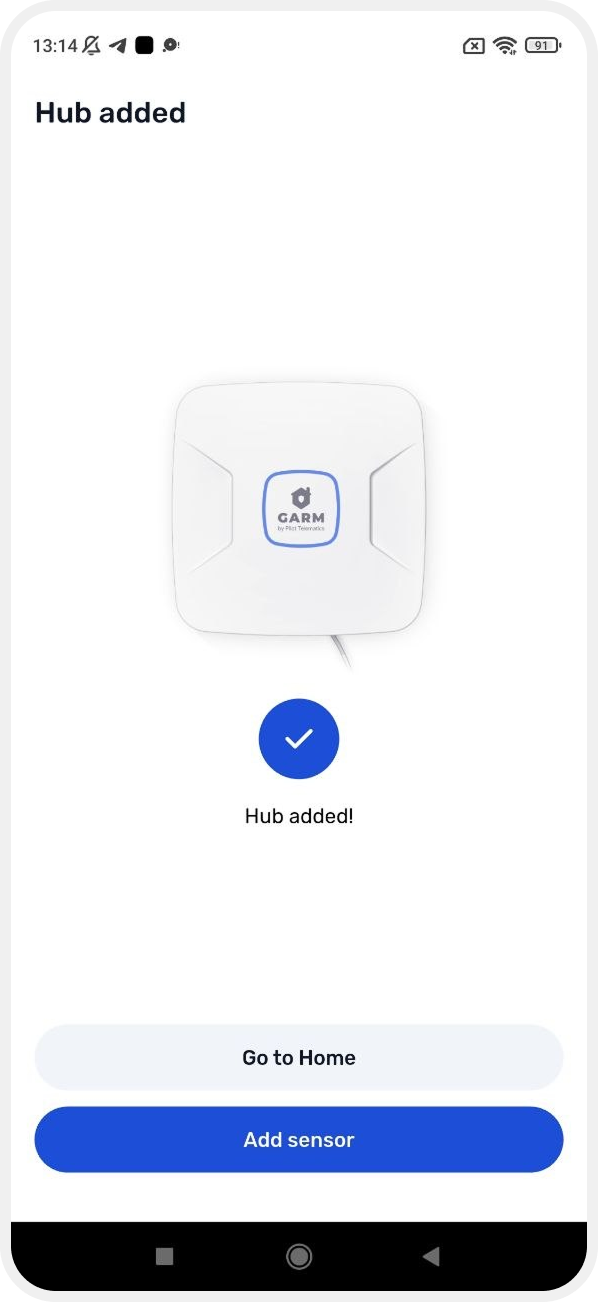
Now you can:
• Go to the main screen — to view your site with the connected hub
• Add a sensor — to immediately start connecting devices such as motion detectors, door sensors, leak detectors, and others
7. Reconnect to your Wi-Fi network
After setup is complete, your phone may still be connected to the temporary hub network (GarmLink_...). Switch your phone back to your regular home Wi-Fi network so the hub can access the internet.