How to configure the hub via web interface
In this article, you’ll learn how to configure your Garm Link PRO hub using the web configurator — a browser-based interface for managing device settings. You’ll see how to connect to the hub over Wi-Fi, adjust essential parameters, and update the device firmware. This allows you to manage your equipment independently and keep it up to date.
How to access the web configurator
To configure your Garm Link PRO hub, use the built-in web configurator — a special interface available through your browser.
Follow these steps:
1. Connect to the hub’s Wi-Fi access point
On your device, go to Wi-Fi settings and look for a network named GarmLink_xxxxxxxxxxxx, where xxxxxxxxxxxx is a unique set of characters.
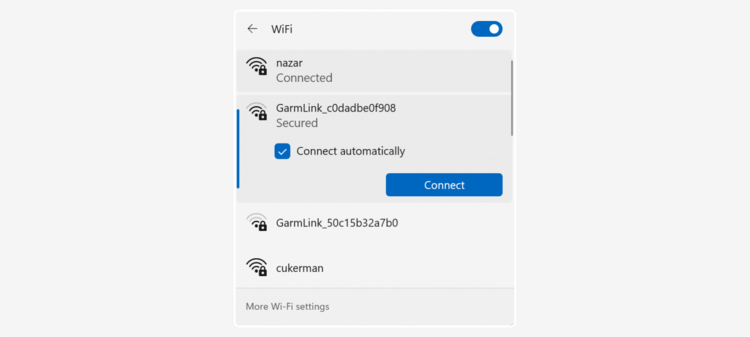
2. Enter the Wi-Fi password
The password is the same as the last part of the network name.
For example, if the network is GarmLink_1234567890AB, the password is 1234567890AB.
3. Open your browser
After connecting to the Wi-Fi network, open a browser and go to the following IP address:
192.168.4.1
4. Wait for the configuration page to load
If the page doesn’t load immediately, refresh it (press the refresh icon or hit F5).

Settings window
What you can configure via the web interface
The web configurator allows you to:
-
Connect the hub to the internet via Wi-Fi or GPRS (SIM card)
-
Add ASTRA wireless sensors
-
Enable and configure wired inputs
-
Add digital temperature sensors
-
Register Touch Memory keys
-
Create security sections
-
Configure LED indicators
-
Enable and configure wired outputs
-
Update the hub firmware
How to update the firmware
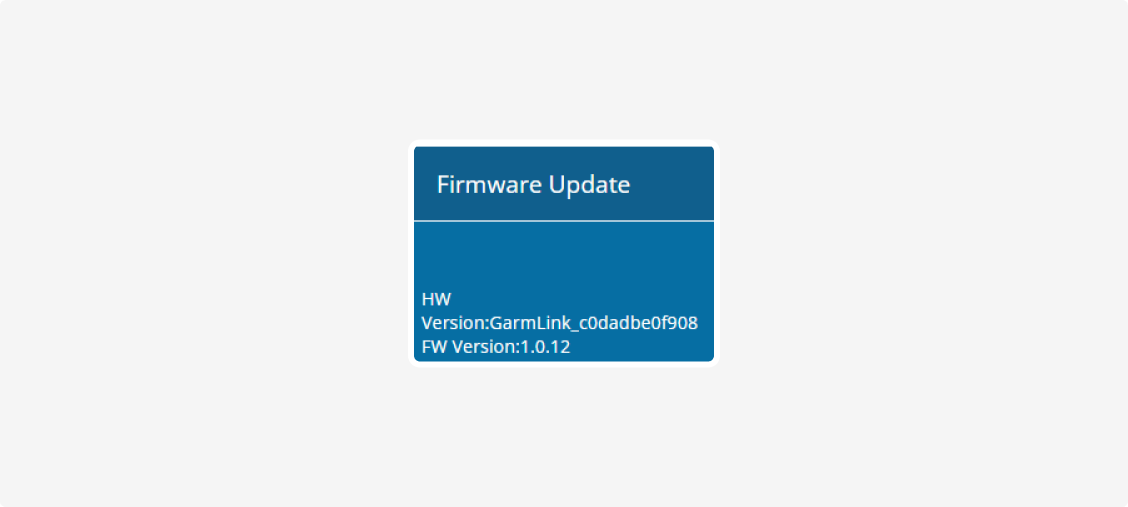
1. On the configuration page, click the Firmware Update button in the bottom left corner
Firmware update
2. On the update page, select the latest firmware file from your device
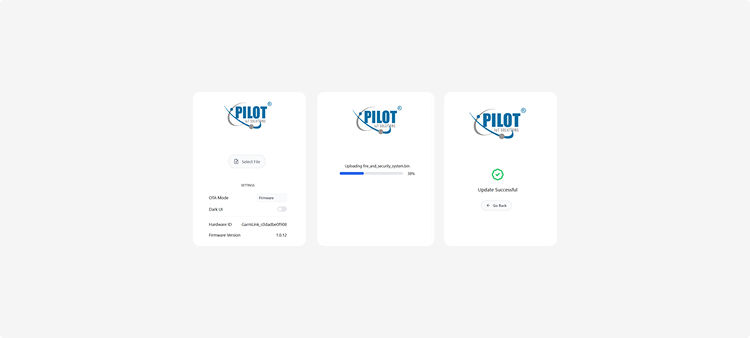
Uploading the firmware file
3. Click Upload to begin the installation
4. After the upload is complete, the hub will restart automatically
After you’ve saved changes to the hub through the web interface, you’ll see a notification in the mobile app prompting you to update the object configuration.
To apply the new settings:
1. Open the object’s main screen in the app
2. Tap the banner at the top that says The device configuration needs to be updated
3. Tap Update and reload to confirm
4. Wait for the update process to finish


Configuration update