How to connect wired outputs
To enable the security system not only to monitor events but also to respond — such as activating a siren, unlocking a door, or turning on a light signal — wired outputs are used.
This guide explains which devices can be connected to the hub's outputs, how to connect them properly, and how to configure their operation through the application.
Outputs are special terminals on the hub designed for connecting actuators:
-
Sirens
-
Light signals (lamps, strobe flashes)
-
Electromagnetic locks
-
Relays
-
Other devices that respond to alarms or commands
Key output parameters
-
Power supply voltage: 12 V
-
Maximum load current: Varies by control panel model. Consult your model's technical documentation to avoid overloading.
Output types
Depending on the task, two output types are available:
-
Relay: dry contact, galvanically isolated. Used for switching circuits with their own power supply
-
Constant +12 V output: active upon triggering (e.g., during an alarm). Suitable for supplying power to a device at the moment of an event
Supported control modes
-
Activation/deactivation upon alarm
-
Pulse mode — brief activation, e.g., for unlocking an electric lock
-
Programmable activation delay — for gradual activation or temporary logic (availability depends on the output type)
Connecting an actuator
If using a constant +12 V output, connect as follows:
1. Connect the device's positive power wire (+) to the +CN_OUT terminal.
2. Connect the device's negative power wire (–) to the –CN_OUT terminal.
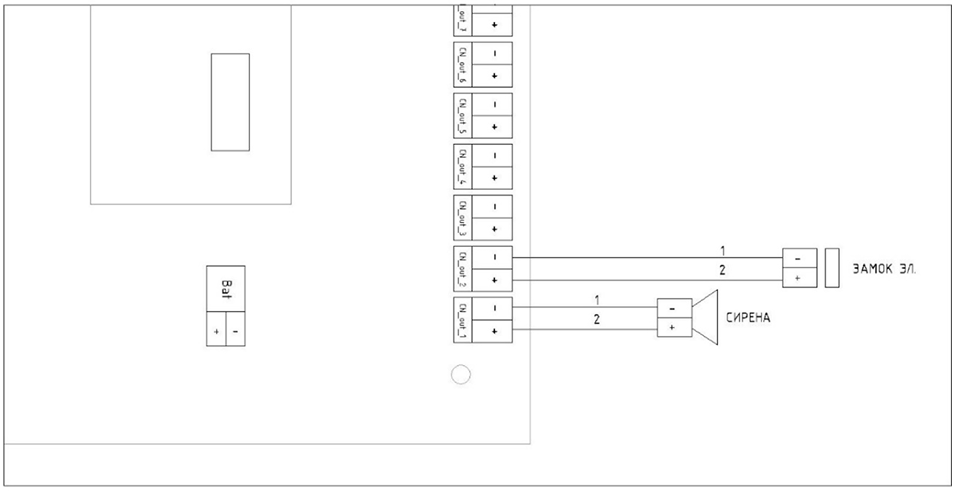
Connecting the actuator
|
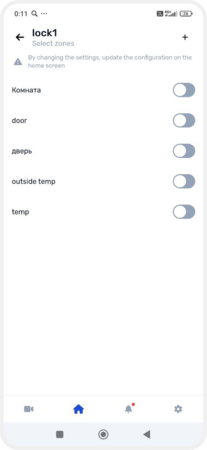
Configuring outputs in the application
1. Navigate to the Outputs tab on the main screen
2. Select the output number you wish to configure
3. Tap it to open its settings


Selecting an output for configuration
4. To activate the output, switch Use to the active position
5. Configure the following:
-
Output name
-
Output type corresponding to the connected device
-
Zone the output should be associated with
If no zone is selected, the output will not function.


Setting up the output
To finalize the output setup, update the device configuration:
1. Return to the main screen
2. A notification will appear at the top: The device configuration needs to be updated — tap it
3. Confirm the update by tapping Update and reload
4. Wait for the update to complete

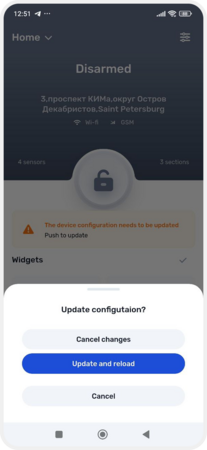
Configuration update