How to create and manage zones
Zones are logical groups of devices combined for convenient control, monitoring, and automated response to events.
Instead of checking and configuring each device separately, you can manage the entire zone as a single unit.
A zone can include sensors, outputs, actuators, and cameras — for example, you can create zones such as Home, Garage, Living Room, or Yard.
This makes it easier to monitor the system status, arm or disarm security, manage devices, and receive event notifications for specific areas.
In this article, you will learn how to create and configure zones and add devices to them.
How a zone works
All devices within a zone operate together — the system monitors their state and reacts if something happens. For example, when one of the sensors is triggered, the system determines the type of event (alarm, fire, fault, etc.) and performs the appropriate action: activates a siren, sends a notification, or turns on another device.
Key features of zones
• Grouping devices by purpose (for example, Perimeter, Indoor areas, Fire detectors)
• Flexible alarm response configuration:
— entry and exit delay
— disabling selected sensors
— different levels of notifications
• Arming and disarming an entire zone with one command
You can create up to 10 zones in the system.
|
Tips for creating zones
For optimal operation, organize your sensors by zone and function:
• Zone 1 – Window and door sensors (perimeter security)
• Zone 2 – Indoor motion sensors
• Zone 3 – Fire detectors
This structure makes it easier to manage security and adjust reactions for real scenarios.
How to create a zone
To create a new zone:
1. Open the Zones tab on the main screen
2. Tap the add icon in the top-right corner
3. Enter the zone name
4. Tap Create — the new zone will appear in the list


Creating a zone
How to configure a zone
After creating a zone, open its settings:
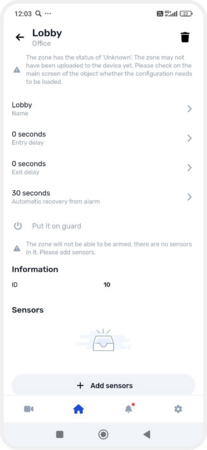
1. Go to the Zones tab and select the desired zone

Zone settings
2. In the settings, you can:
— change the zone name
— set an entry delay — time before the alarm triggers after entering


— set an exit delay — time before arming starts after leaving


— enable auto-restore — return the zone to armed mode after an alarm

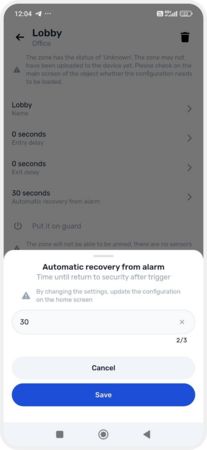
3. Tap Save, then update the device configuration on the main screen
How to add devices to a zone
To make a zone fully functional, add sensors and outputs:
1. Open the Zones tab
2. Select the desired zone
3. Tap Add sensors or Add outputs
4. In the list, enable the required devices by switching their toggles to the active position
5. After adding devices, update the configuration on the main screen
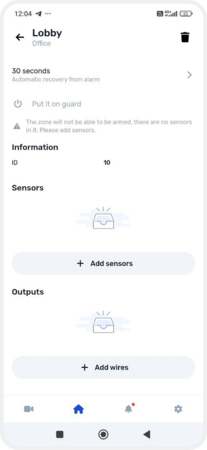

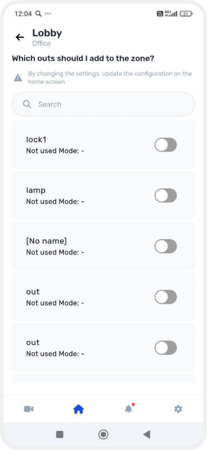
Adding sensors and outputs to a zone
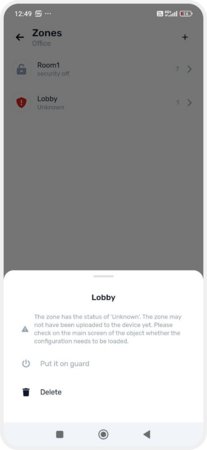
How to arm a zone
1. Open the Zones tab
2. Select the desired zone
3. Tap Put it an guard — the zone will switch to security mode

Setting the zone to security
How to delete a zone
You can delete a zone in two ways:
Method 1:
1. Go to the Zones tab
2. Select the desired zone
3. Tap the menu icon in the top-right corner and confirm deletion
Method 2:
1. In the zones list, press and hold the needed zone
2. A context menu will appear — select Delete
Deleting a zone
To apply any changes made to the equipment settings:
1. Return to the main screen of the object
2. A notification stating The device configuration needs to be updated will appear at the top — tap on it
3. Confirm the update by selecting Update and reload
4. Wait for the update process to complete

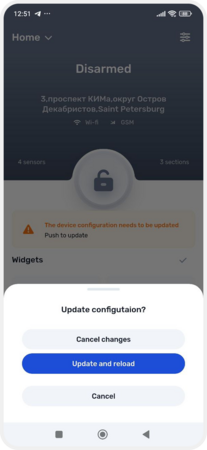
Configuration update