How to connect and configure wireless sensors
The GARM system supports ASTRA wireless devices — easy-to-install, wire-free sensors that enhance your security setup. This guide walks you through adding, configuring, enabling, managing, and, if needed, disabling or removing these sensors.
The GARM Link PRO hub exclusively supports ASTRA wireless devices. For a comprehensive list of compatible models, refer to the Frequently asked questions about GARM
|
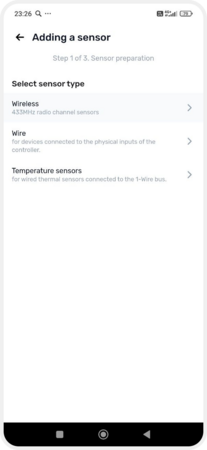
How to add an ASTRA wireless sensor
To add a wireless sensor:
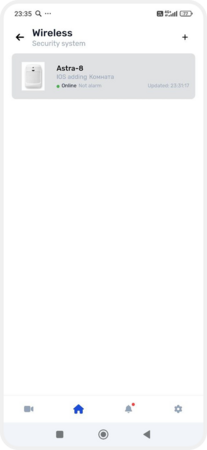
1. Navigate to the main screen of the application
2. Tap the Sensors tab
3. On the sensors page, tap the icon in the top-right corner
4. Select Wireless as the sensor type


Adding a wireless sensor
5. This will launch the sensor registration wizard
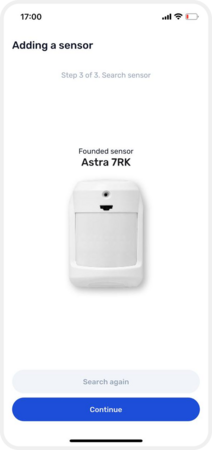
6. Follow the on-screen instructions; the application will begin searching for nearby ASTRA wireless devices
Prepare the sensor and the battery, and keep them close to the hub. In the app, tap Start search — the hub will switch to pairing mode.
Now insert the battery into the sensor and make sure it turns on. After that, wait until the sensor appears on the screen.
|


Sensor registration wizard
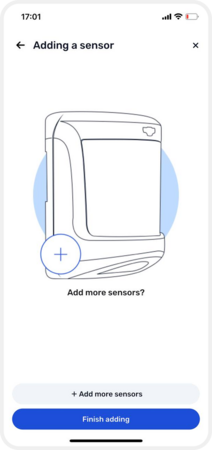
Once the sensor is detected:
1. Assign a name to the sensor
2. Select the sensor type from the list
3. Associate it with an existing zone or create a new one
Sensors not linked to a zone will appear in the list but won't trigger alarms. For guidance on creating sections, see here.
|


Setting up the sensor
How to enable a sensor
After adding the sensor, enable it:
1. Go to Object settings → Equipment
2. Tap on the hub to access its settings
3. Under the hub's sensors, select Wireless
4. Choose the desired sensor
5. Toggle the Enable sensor switch to activate it


Enabling the sensor
To complete adding the sensor, you need to update the device configuration.
When you add a new ASTRA wireless sensor or modify equipment settings, changes are saved in the app but not immediately applied to the hub. To implement these changes:
1. Return to the main screen
2. A notification stating The device configuration needs to be updated will appear at the top — tap it
3. Confirm by tapping Update and reload
4. Wait for the update to complete. If you change your mind, you can tap Cancel changes


Configuration update
Managing sensors
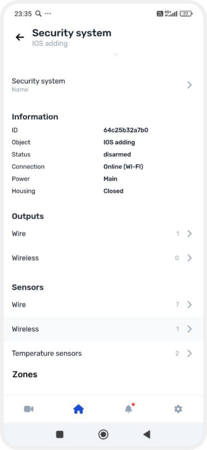
All active wireless devices are listed on the main screen:
1. Navigate to the Sensors tab
2. View the list of all added devices
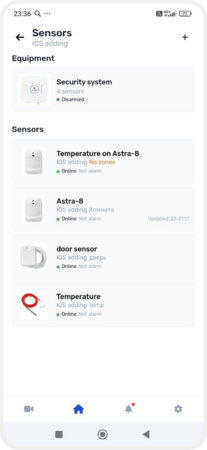
List of active sensors
Sensors not assigned to a zone will also appear here. You can assign them to a zone later.
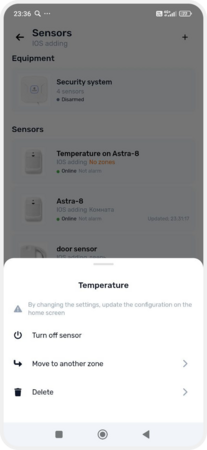
To move a sensor to a zone
1. Press and hold the desired sensor
2. From the menu, select Move to another zone
3. Choose an existing section or create a new one
Sensors not assigned to a zone won't trigger alarms upon activation and will display a "No zones" status.
|
Moving the sensor to the zone
Disabling or removing a sensor
How to disable the sensor
This option is useful if you're not currently using the device but wish to retain its settings.
1. Navigate to Object settings → Equipment → Sensors → Wireless
2. Select the sensor and tap Disable sensor
How to delete the sensor
-
Via sensor settings1. Open the specific sensor's settings2. Tap the trash bin icon
 in the top-right corner
Deleting via sensor settings
-
Via the sensor list1. Go to the Sensors tab2. Press and hold the desired sensor3. From the menu, select Delete
Deleting via the sensor list